Wednesday, December 5, 2012

Chocolate Cupcakes with Peppermint Icing and Chocolate Ganache

Today is my orchestra teacher's birthday. Miss B is loved by everyone because she is an extremely devoted instructor and her eccentricity never fails to bring some color to orchestra rehearsal. The senior girls thought that it would be a good idea to honor Miss B on her special day by throwing her a party. Girls came in early this morning and elaborately decorated the orchestra room with streamers and balloons. I meant to come in early, but Wednesdays are my day to sleep in and I had some stuff going on. Instead, this was my contribution to Miss B's birthday extravaganza!
I know they're kind of a mess. But they're tasty. More than tasty. I personally feel that they were awesome, and to be honest I rarely feel that way about my baked goods. Especially when I didn't truly follow a recipe and kinda just winged the entire thing. I can make a recipe for you lovely people though!
Since I had to make enough cupcakes for my rather large orchestra class, I used boxed dark chocolate cake. I added some brown sugar and vanilla to the mix for moisture and flavor, but that was about it. Boxed cake is better than rushed homemade cake though! It worked.

Peppermint Frosting (my own made up recipe!)

  • 1/2 cup butter, room temperature
  • 4 ounces cream cheese, softened
  • 3 1/2 cups powdered sugar
  • 1 teaspoon peppermint extract
  • 1-2 teaspoons milk, if needed
  • food coloring if desired
  • candy cane pieces (optional)
- Beat butter and cream cheese together until creamy. Add in peppermint extract.
- Add powdered sugar in one cup at time and mix slowly until incorporated.
- Add milk if necessary and food coloring and candy cane pieces.

Now, if you're a normal person you could just stop there and have some delicious chocolatey and pepperminty cupcakes... If you're me, you're thinking you need more chocolate. So. Chocolate ganache it is!

Chocolate Ganache
  • 1 cup heavy cream
  • 1 1/2 cup chocolate chips
  • 1 teaspoon vanilla extract
-In a bowl pour chocolate chips and vanilla. Set aside
- In a small saucepan bring cream to a boil.
- Pour cream over chocolate chips, stir until chocolate is completely melted and incorporated. Let stand until thickens then top cupcakes. Add more candy cane pieces if desired!
Happy birthday, Miss B! And enjoy!

Red Velvet Thumbprints with Marshmallow Frosting

I'm afraid that I've become a terrible blogger. I just realized that I haven't posted anything since August, but I definitely know that I've baked PLENTY of goodies since August. One of these days I'll get better, I swear. I hope these cookies are able to be my apology.
My mouth honestly begins to water when I look at these. If you're anything like me, you believe that red velvet is both the king and queen of the baked goods world. Add some marshmallow frosting, and I'm sold for life.
I was originally supposed to make six dozen of these cookies for Noah's mom over the weekend for a cookie exchange, but plans changed. I decided that I still needed to bake, so I thought I'd take these cookies for a test run to see if they were worth six dozen. I do know that anything my favorite blogger posts is going to be delectable, but a girl has to look for excuses, right?!

Red Velvet Thumbprints:
(makes about 20 cookies)
  • 1/2 cup butter, room temperature
  • 1/4 cup sugar
  • 2 tablespoons brown sugar
  • 1 teaspoon vanilla extract
  • 1/4 teaspoon salt
  • 1 egg yolk
  • 1 cup flour
  • 2 tablespoons unsweetened cocoa powder
  • 1 1/4 teaspoons red food coloring (may need more or less if using gel or liquid food coloring)
  • 1/2 mini chocolate chips
- Preheat the oven to 375 degrees F.
- Sift together flour, cocoa powder, and salt into a bowl and set off to the side.
- In a separate bowl, beat together butters and sugars until light and fluffy. Add in egg yolk, then vanilla and beat for another minute until combined.
- Add in red food coloring and mix until the color spreads completely.
- With a mixer on low, slowly beat in flour mixture, then gradually increase the speed for the dough to come together. Once dough has come together, fold in the chocolate chips.
-Roll into one inch balls, bake for five minutes, remove from oven and gently press your thumb into each of the cookies. Place the cookies back in the oven for another 5-6 minutes, then remove and let cool completely before frosting.


Marshmallow Cream Cheese Frosting
  • 4 ounces cream cheese, softened
  • 1 tablespoon vanilla extract
  • 3/4 cup marshmallow fluff
  • 1 3/4 cups powdered sugar
  • 1-2 teaspoons milk, if necessary
- Beat cream cheese with mixer until creamy. Add in marshmallow fluff and beat for an additional 2-3 minutes, then add vanilla.
- With the mixer on low, add in the powdered sugar 1 cup at a time until fully incorporated. If the mixture is runny, add more sugar. If the mixture is too stiff, add milk, one teaspoon at a time.

Wednesday, August 22, 2012

Brown Butter Double Fudge Chocolate Chip Cookies

I know the name of this recipe is a mouthful. But seriously... Somewhere in the heavens cookie gods are crying tears of joy thanks to this woman, and all that she bakes, then inspires me to bake... and devour half the batch with my boyfriend in one day during a Lost marathon. Calories don't exist if you don't count them, right?
Now, they might not be the prettiest cookies that cookie gods have ever seen, but it doesn't have to be pretty to taste so completely delicious.
So yesterday I was craving chocolate like no one's business, but I also knew that if I made something, it would have to be something Noah would like too, since we were hanging out and slowly trying to finish Lost on Netflix (We still haven't gotten there. We have 15 episodes left until our life is over as we know it.) This is what we found. They've become Noah's new favorite cookies and quite possibly mine too, although I probably could have stopped at dough and eaten the entire batch myself, then seriously regretted it later. Well. Actually. No regrets. These were just that good.

**There are two options to make this dough according to the original blogger. You can make the dough below in two half batches, or if you have a kitchen scale you can separate it equally once made. Since I thought the half batches were too complicated, I just had Noah separate it as best he could in half. It worked.

What you'll need:

  • 1 3/4 cups flour
  • 1/4 cup cocoa powder
  • 1/2 teaspoon baking soda
  • 1 1/2 sticks butter
  • 1 cup brown sugar
  • 1/2 cup sugar
  • 1 egg & 1 egg yolk at room temperature
  • 2 teaspoons vanilla extract
  • 1 1/2 cups chocolate chips (I used the entire bag, which is just over 2 cups. I like chocolate).
To make:
  • Preheat oven to 325 degrees and lightly grease two cookie sheets.
  • Heat butter in a saucepan on medium-low heat, stirring constantly until brown bits appear on the bottom. This should take about five minutes. Remove from heat and let cool completely.
  • Once cool, add to a large bowl with the white and brown sugars and whisk until smooth. Whisk in the egg and egg yolk, then the vanilla.
  • Separate the very liquidy dough into two bowls evenly.
  • In one bowl add 1 cup flour, 1/4 teaspoon baking soda, and a pinch of salt until the dough forms. It might be time to get your hands messy and use them to incorporate the dough. Once mixed, fold in half of the chocolate chips and set aside.
  • In the other bowl add the remaining flour (3/4 cup) and baking soda (1/4 teaspoon) and another pinch of salt. Add in cocoa powder and mix until dough forms, then fold in remaining chocolate chips.
  • Roll each dough into twelve balls about one inch thick. Take one of each kind of dough and put  on top of each other, then place on baking sheet and bake for 10-12 minutes.
  • Devour and enjoy.
The "Lost" cookie plate. It was gone in a blink of an eye and I have no idea what happened.


Tuesday, August 14, 2012

Bonnie Butter Cupcakes with Buttercream Frosting

Let me tell you something: I hate all vanilla cupcakes I make. I don't know why, but I feel like when I make them they turn out to be too dry or taste too much like flour. Other people may say they're fine, but I wouldn't have it. Instead I spent months too scared to try any vanilla cake recipes, and just stuck to boxed cake. That sucked, because I do love white cake, but I feel like boxed cake is cheating. As a baker, I have no desire to cheat.

But then I found these...

Bonnie Butter cake is something I've been eating since I was little. My wonderful Grandma Pat (who I probably got the baking addiction from) used to make this cake for my birthday every year, and I always pretty much died because it was so good, and so rich. Unfortunately, I don't visit my Grandma very often since she lives way in the boonies, near Hinckley. Luckily the last time we went up there for a visit, I asked her about this recipe. Little did I know, that it was from an old Betty Crocker cookbook. I figured if I was going to get over my fear of making white cake, this would to be the recipe to do it. Boy, was I right.

If I actually had any talent at making two layer cakes, I would've attempted that, but since my cakes always end up looking like the Leaning Tower of Pisa, I stuck close to home with cupcakes.

What you'll need:

  • 2/3 cup butter, softened
  • 1  3/4 cups sugar
  • 2 eggs
  • 1 1/2 teaspoon vanilla
  • 2 3/4 cups all purpose flour
  • 2 1/2 teaspoons baking powder
  • 1 teaspoon salt
  • 1 1/4 cup milk
To make:
  • Preheat oven to 350 degrees and line cupcake pans with cupcake liners.
  • Mix butter, sugar, eggs, and vanilla. Beat for 5 minutes.
  • On low mix in flour, baking powder and salt alternating with milk.
  • Pour into liners and bake for 15-20 minutes.
  • Let cool and frost
Since I always use the same buttercream frosting recipe, I might as well just post it again.

What you'll need:
  • 1 cup butter (I recommend European style. It's creamier and so worth the extra cost)
  • 2 1/2 cups powdered sugar
  • 1 tablespoon vanilla
  • Milk (only add until reach desired consistency. I rarely end up using any.)
To make:
  • Cream butter, then slowly add in vanilla then powdered sugar. Add milk one teaspoon at a time until reached desired consistency.
Enjoy!

Thursday, July 19, 2012

Chocolate Cupcakes with Salted Caramel Frosting

I don't know about you, but I dream in cupcakes, chocolate and caramel. Maybe it's just a teenage girl thing. I know I have all those hormones rushing around, including the ones that make me crave junk food like there's no tomorrow. Today I was able to make all of my dreams come true, and I topped it all off with a pretzel.


Like most of my baking expeditions, this one stemmed from three things: boredom, an empty stomach, and internet access. I found this recipe on a blog that could become my new favorite, Sally's Baking Addiction. That girl speaks to my own baking addiction, and my cravings. Today Sally taught me how to make boxed cake into something special and amazing. She may have given me a new excuse to be lazy and never make cupcakes from scratch again. These tasted just as good, if not better.


What you'll need (for the cake):

  • 1 box Devil's Food Cake Mix (I used Duncan Hines, because it's what I saw on her blog)
  • 1 small box of instant chocolate fudge pudding mix
  • 4 eggs
  • 1/2 cup vegetable oil
  • 1/2 cup milk
To make:
- Preheat the oven to 350 degrees and line cupcake tin with liners (I ended up only making about 20 cupcakes, but you can always shoot for the full 24)!
- Using a mixer, mix together cake mix, pudding mix, oil, eggs, milk, and sour cream until well combined.
- Scoop batter into cupcake liners. I typically use 1/4 of a cup to scoop to make them as even as possible, even though it doesn't always work out.
-Bake 20-25 minutes or until an inserted toothpick comes out clean. Let cool then top with frosting and pretzels.
What you'll need (for frosting)
  • 1/2 cup (1 stick) butter
  • 1 cup brown sugar
  • 1/3 cup heavy cream
  • 1/4 tsp salt
  • 2-3 cups powdered sugar

To make:
- In a small saucepan, melt the butter.
- Once melted, add sugar and cream and constantly mix until dissolved.
- Add salt then let bubble for about another minute, then remove from heat and let mixture cool.
- If desired, remove some of the caramel and set aside to top cupcakes with later.
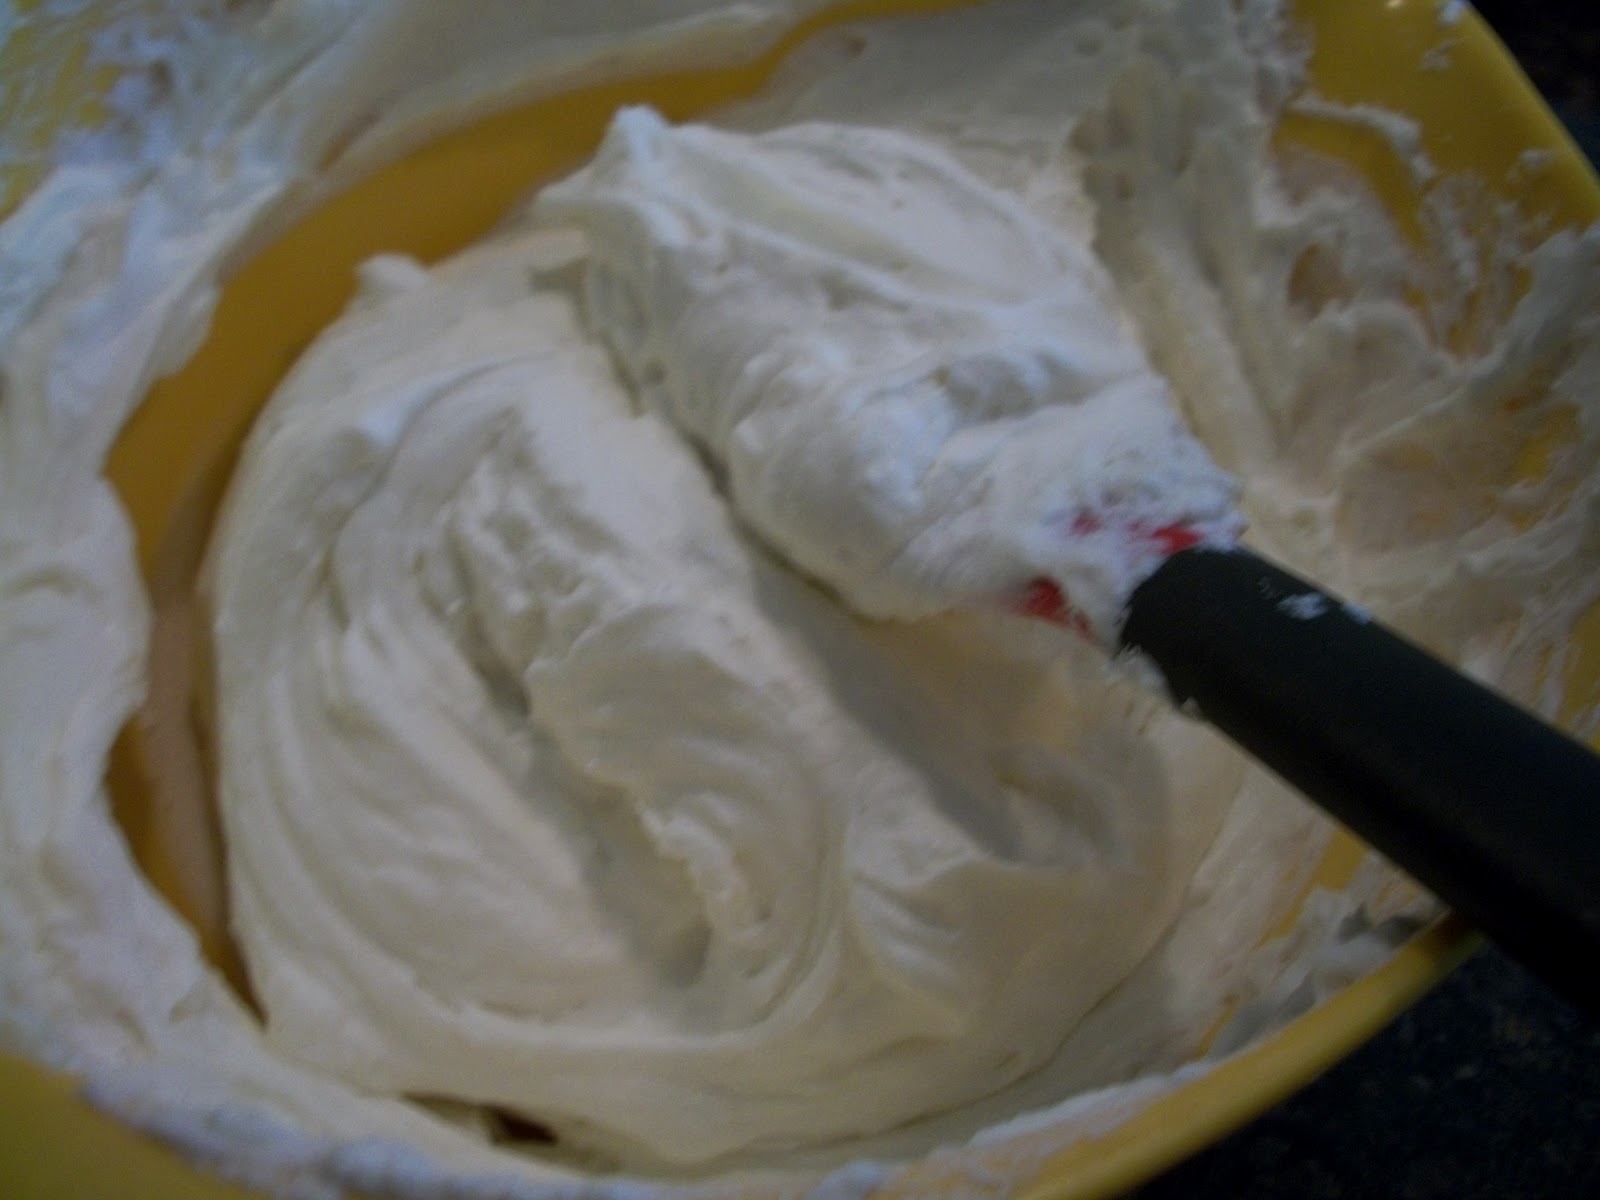
- Slowly beat in powdered sugar one cup at a time, until desired consistency is reached. Top cupcakes with frosting. WARNING: The frosting hardens rather quickly, so if you do decide to pipe it get to work fast! I made that mistake. Most of them turned out pretty in the end.

It was all really as simple as that. My dad gave the thumbs up on these, so they must be good. As always, enjoy!

Wednesday, June 20, 2012

Strawberries and Cream Pie

These babies are in season. That means that there was no way I could pass them up and not use them in my baking. So I found this to make on a hot Friday afternoon. No bake, sweet, rich, yet somehow light. It was the perfect summery dessert.

What you'll need:
-1 graham cracker pie crust
- 2 8 oz packages of cream cheese, room temperature
- 2 cups heavy cream + 1 tablespoon
- 2/3 cup sugar
- 2 teaspoons vanilla
- 1 carton of strawberries, sliced
- 1/2 cup chocolate chips.

To Make:

- In a mixer, beat cream until it peaks.
- In a separate bowl, cream together the cream cheese, sugar, and vanilla
- Fold in about 1/3 of the cream into the cream cheese mixture to mix, then fold in the rest.


I would recommend you taste this mixture. Only because it's delicious and you might not be able to stop eating it. Noah and I had issues when we made this. Just look at it. Doesn't it look yummy?
-Okay, now that you've hopefully tested this, pour the mixture into the pie crust, then top with strawberries.


One could stop right there. You would have a delicious strawberry pie and have no regrets. But since I'm a chocoholic, I had to melt chocolate chips and top the pie. The only issue was that they didn't get liquidy enough to really drizzle over the pie, so it would be smart to melt them with a tablespoon of cream.

The final product may have not been beautiful, but it was delicious. The Couets enjoyed it, and Noah and I had fun making it. We even had time for a pie fight.
Happy summer and enjoy!

Cupcakes, Cupcakes and... Oh Yeah, Cupcakes

So as of late, I haven't exactly been trying out new recipes to share on here. I've been baking lots and lots of simple cupcakes. First I had my cousin's wedding party, and I made her more of those seashell cupcakes*. Then Noah had a grad party... Then my friend Erin had a beginning of the summer party. You'd think I'd be all cupcaked out. You're wrong. I'm just looking forward to spending the summer trying out different kinds of cupcakes. I'm ready to experiment and I'd love suggestions!

So here are some pictures of cupcakes I've made or helped make recently.


Noah's grad party


Erin's party. 

*Not pictured, seashell cupcakes.

S'mores Pizza

Since a picture is worth a thousand words, I don't think that I need to say anything more after showing you that. Seriously. If you don't think that looks delicious, then there's something wrong with you.

So this little experiment happened almost a month ago, but I decided to finally blog about it now, because it's crappy out and I need something to do before I stuff my face with pizza. I wish I was stuffing my face with this pizza.

What you'll need:

  • One tube of Pillsbury pizza dough, or whatever brand you prefer
  • 1 bag of chocolate chips
  • Mini marshmallows
  • 1/3 cup brown sugar
  • 1/2 cup rolled oats
  • 2 tablespoons softened butter
  • 1/4 cup flour
To make:

- Prepare the pizza dough according to directions on tube.
-Dump the entire bag of chocolate chips on top of prepared crust, following with as many marshmallows as you'd like.
-In a bowl combine the brown sugar, oats, butter and flour. Sprinkle mixture on top of pizza.
- Bake for ten minutes, then enjoy!

Before...

After. With a bite taken.

Monday, April 23, 2012

Seashell Cupcakes

So... Last week was a long week. School is stressful on a whole multitude of levels. The only thing that got me through Friday was the prospect of these.
Aren't they adorable?! Come on, tell me they're adorable... I came home on Friday and decided to get baking. I made these for my cousin Cecilia's wedding shower that was the next day, Saturday. She's getting married next month in Iowa, but the wedding shower was beach themed, so it was time to be a little creative!

Of course, I had help with this project. Morgan took care of most of the seashells which were made with Wilton Candy Melts in a Wilton Candy Seashell mold. Those candy molds are fun to play with and they're available at almost ever craft store. I also had help from my awesome boyfriend, Noah. Look at us, rocking some aprons.
Since I had to make forty eight cupcakes, and I wanted to make they were tasty, I simply used boxed cake mix for the cupcakes. My new favorite method is to put all the batter in a large Ziploc bag then cut off the bottom corner to pipe the batter into the cupcake liners. It's so much neater than spooning batter into the liners, and I'm a messy baker as is.

Noah really likes his cupcake batter.

For the frosting, I simply used my favorite butter cream frosting recipe, found here. I dyed the frosting light blue and piped the frosting to kinda look like waves. The project was really easy and the results were phenomenal. I received many wonderful comments at the shower and I appreciated every single one of them. I'm glad my baking addiction can benefit others in some way.

As always, enjoy!

Tuesday, April 17, 2012

Chocolate Chip Cookie Dough Peanut Butter Cups

Hey! Take a look at my weekend.
Oh yeah. You got that right. It's the perfectly heavenly combination of my three favorite things: peanut butter, cookie dough, and chocolate. I happened to get this recipe from my favorite food blog. This woman is probably the biggest fuel to my baking addiction. I try out a ton of her recipes. I promise to blog about them today between intervals of dancing to James Taylor and Neil Diamond with my little sister, Alaina. She really seems to love to dance with me... That probably has to do with the fact that I make silly faces while lip-syncing.
Anyways... On to these amazing things!
You can either click the link, or I'll just re-post the recipe here.

What you'll need:

  • 2 1/2 cups milk chocolate chips
  • 1/2 cup (1 stick) butter
  • 1/3 cup brown sugar, packed
  • 1 teaspoon vanilla
  • 1/4 cup creamy peanut butter
  • 3/4 cup powdered sugar
  • 2 tablespoons flour
  • 1/4 teaspoon salt
  • 1/2 cup mini chocolate chips
-In a small saucepan, warm butter until melted. Whisk in the 1/3 cup of brown sugar until fully dissolved, then let the mixture bubble for a minute or two. 
-Remove pan from heat then whisk in peanut butter, then vanilla. The mixture will be very liquidy, let it set for twenty minutes to cool fully.
- Line a mini cupcake pan with 24  mini cupcake liners. Melt 1 1/4 cups of milk chocolate chips in the microwave. Then pour about one teaspoon of chocolate in each liner and using a pastry brush (or in my case, a rubbery basting brush thing, that looked more like a squid, but was fun to play with) and brush the chocolate around and up the sides of the liner. Place in freezer for twenty minutes to harden.

-Once heated mixture has cooled, whisk in powdered sugar, salt and flour and combine until just a few lumps remain. Then fold in the chocolate chips, and place the mixture in the fridge for fifteen minutes so the mixture can solidify. 
- Take mixture out of fridge and the chocolate cups out of the freezer. Roll about one teaspoon of the cookie dough mixture into a ball and place in the chocolate cups. 
-Melt the remaining chocolate and top the chocolate cups. Then place back in the freezer for fifteen minutes.
After that, feel free to enjoy! I had to keep these in the fridge because they were melty, but they were devoured all the same. I made these on Saturday with my two amazing friends Chelsea and Meghan and by Sunday they were gone. I'm definitely guilty of eating one or twelve... I can't wait to make these again.